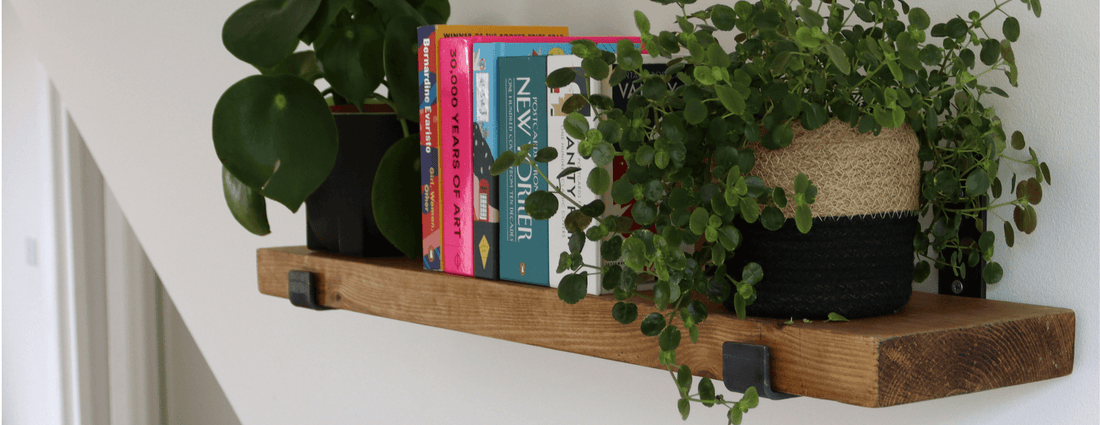
Scaffold shelving is a great design to combine rustic charm with functional storage space. However, the installation process can seem daunting, especially if you’re still building up your DIY skills. This guide aims to demystify the process, providing you with a comprehensive walkthrough on how to install scaffold shelves safely and securely.
Before you start, here’s a checklist with all the materials and tools you’ll need.
Your Checklist

Essential Materials
- Scaffold boards
- Metal brackets
- Wall Plugs 8mm
- 4 Screws per shelf to attach the brackets to the wall
- 4 Screws per shelf to attach the brackets to the scaffold board
- Masking tape
- Pencil

Implementation Tools
- Drill
- 3mm high-speed steel drill bit for wood
- 8mm masonry drill bit for your wall
- Cross-head screwdriver drill bit or a screwdriver
- Safety goggles
- Dust mask
- Spirit level
- Tape measure
- Stud and electric wires wall scanner
- Dust sheet
- Pin hammer
Step 1: Positioning your shelves
Begin by deciding where you want your shelves to be. Consider the length of your scaffold boards and how many shelves you want to install.
-
Pick up your shelf with the brackets and try positioning on the wall. If it’s too big make sure to ask a mate or a family member for some help.
-
Mark the position of the shelf with a pencil or masking tape.

CAUTION & SAFETY: Before you finalise the placement of your shelf, it’s important to check any live electrical wire or pipes, using a wall scanner. Also check if there are any plug sockets located on the wall. Note if your shelf is shorter than 120cm, you’ll only be attaching the batons to the side walls.
-
Adjust your shelf’s position if necessary
** If you have a stud wall, it is generally recommended to drill through and attach your shelf to the stud for additional support. However, we know that trying to locate the studs can be impractical. In this particular shelving design, the weight will be widely distributed as it’s supported at more than one side. The universal wall plugs included in your Roomix kit will also provide extra security for your project.
Step 2: Adding your brackets
Your brackets should be evenly spaced to distribute the weight evenly. Put on your safety glasses and dust mask. In this step you’ll create pilot holes and attach the brackets to your scaffold board.
-
Grab your scaffold board and use a pencil to mark the exact points board where the brackets will be installed.
-
Place a scrap piece of wood on the area you’ll be drilling to protect the surface underneath
-
Insert the 3mm high-speed steel drill bit for wood into the drill and use the drill to carefully make a hole through all your marked pilot holes. Start drilling slowly and make sure you hold the drill straight through the frame and not at an angle.
If you're a first-time power drill user, we’ve put this introductory article to help you familiarise yourself with how to use it. You can also try practising on some spare wood before drilling into your pilot holes. You must have created 4 pilot holes.
-
Grab the shorter screw
-
Change your drilling bit to the cross head screw bit
-
Place your bracket on the scaffold board, insert the two screws and drive them through the two pilot holes, tightening them until the bracket is fixed in position.
-
Repeat the last 3 steps for all the other brackets.
Step 3: Levelling your shelf
Now that you’ve attached the brackets to your scaffold board, you need to mark the drilling holes to the wall. For best results, we recommend asking for some help.
-
Place the shelf to the wall
-
Get your spirit level and check if the shelf is level
-
Each bracket has two pre-drilled holes, mark them with your pencil. This is where you’ll be making your drilling holes on the wall. If you’re aiming to drill through a stud, make sure the bracket is placed in the right position on the wall and make any appropriate adjustments to its position.
Step 4: Drilling your wall & fixing your wall plugs
-
Get your drill and insert the 8mm masonry drill bit.
-
Put one of the wall plugs next to the drill bit, tip down. Then get a small piece of masking tape and wrap it around the drill bit where the wall plug ends. This will act as a guide as to how deep to drill into the wall
-
Drill a hole in the wall where you have previously marked, pushing quite firmly. Stop when you get to the masking tape
-
Use a dry brush to get rid of any dust then insert the wall plug. Use a hammer to gently knock it flush into the wall
-
Repeat the last two steps for the remaining drilling holes.
Step 5: Finishing it off
You’re almost there!

-
Gather all the longer screws
-
Put your cross head screw bit on the drill or grab your screwdriver
-
Get your scaffold board with the attached brackets and place it on the wall. The hole in the brackets should meet the holes in the wall.
-
Drive the screws through all the bracket holes into the wall plugs until the all screws are tightly in place
Congratulations, you’ve installed your scaffold shelf! Now you can start styling it and adding all your decorations.
With these steps, you'll have a safe, secure scaffold shelf in no time. Don't rush the process, take some breaks if you need and if you feel unsure about a step, we’re here to help out. Just reach out to us.


