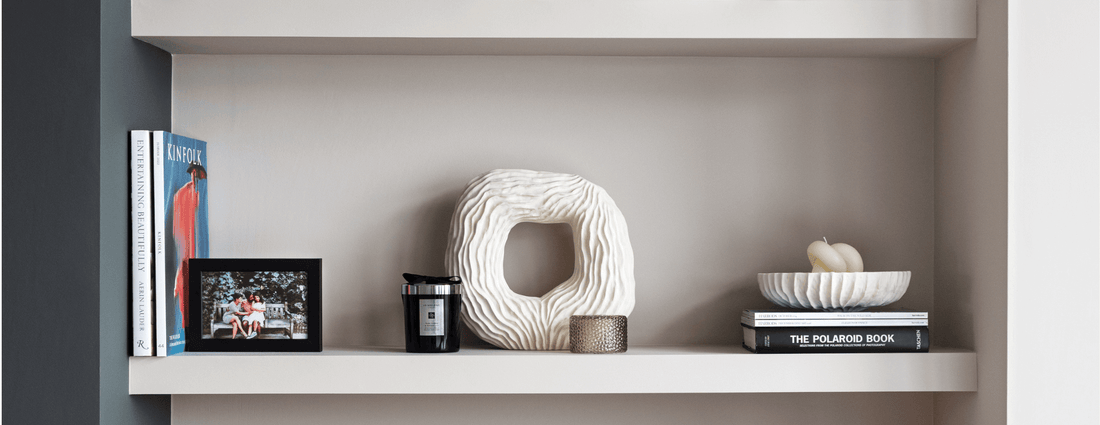
Alcove shelving can enhance the functionality and aesthetics of awkward spaces around your home. In this step-by-step, we’ll walk you through every step of the installation process. From measuring and preparing the area to securely installing the shelves and giving them a professional finish, we'll cover everything you need to get successful results.
If you’re a DIY beginner and you’re just getting started with your projects, we’ve included supporting video instructions for using the power tools, such as the drill.
Before you start, here’s a checklist with all the materials and tools you’ll need.
Your checklist

Essential Materials
- Paintable alcove shelf made-to-measure
- One long wooden baton made-to-measure for the back of your alcove
- Two shorter wooden batons made-to-measure for the sides of your alcove
- 8 Wall Plugs per shelf
- 8 Screws per shelf
- Caulk
- Primer
- Masking tape
- Pencil

Implementation Tools
- Drill
- 5mm high-speed steel drill bit for wood
- 8mm masonry drill bit for your wall
- Cross-head screwdriver drill bit or a screwdriver
- Safety goggles
- Dust mask
- Spirit level
- Tape measure
- Caulking Gun
- 2" paint brush for walls and ceilings
- 4" paint roller for painting your shelf
- 9" paint roller for painting your alcove walls
- Paint tray
- Wall scanner
- Dust sheet
- Tack clothes
- Electric sander (optional)
Step 1: Prep your space
Move or protect any furniture in the area. Ask a mate or a family member to help move anything heavy. Spread a dust sheet on the ground underneath you to protect your floor.
Step 2: Checking the fit
This is one of your most important steps for getting a good finish.
-
Try placing your shelf to the alcove to check how it fits
If your shelf it’s a few cm smaller that’s okay, the gaps will be covered on ‘Step 7’ when you add the caulk to create the built-in look. If it’s a few cm bigger we recommend sanding it down using an electric sander.

Step 3: Marking & levelling the alcove shelf frame on your wall
First check where you’d like to position your shelf.
CAUTION & SAFETY: Before you finalise the placement of your shelf, it’s important to check any live electrical wire or pipes, using a wall scanner. Also check if there are any plug sockets located on the wall.
-
Adjust your shelf’s position if necessary
** If you have a stud wall, it is generally recommended to drill through and attach your shelf to the stud for additional support. However, we know that trying to locate the studs can be impractical. In this particular shelving design, the weight will be widely distributed as it’s supported at more than one side. The universal wall plugs included in your Roomix kit will also provide extra security for your project.
-
Grab one of the short wooden baton, your spirit level and pencil
-
Place the wooden baton on the wall in the position you decided to install the shelf, keeping the spirit level on its bottom side. Make any adjustments to make sure the wooden baton is level.
-
Use to the top of the wooden baton as a guide and mark the position of the shelf with a pencil
-
Continue marking your frame by moving the wooden button with the spirit level across all the three sides of your alcove

In the following steps, 4 and 5, you’ll be attaching the alcove frame to your wall.

Step 4: Creating your pilot holes
In this step you will create pilot holes in the wooden baton of the alcove frame. Drilling a pilot hole prevents wood from splitting and makes using screws to join the wood to the wall easier. We recommend creating two pilot holes in the shorter wooden buttons that support the sides of your alcove and four pilot holes in the longer wooden button which is placed in the back.
First you’ll need to mark your pilot holes. It might not be possible to space out the pilot holes as exactly as above, you might need to make adjustments on how evenly you space them in case you’re aiming to join them into a stud or you’re avoiding drilling into a wire. Try to keep them as evenly spaced out as possible, marking them at least 5 cm apart from each other so the weight of your shelf is evenly distributed.
If you don’t need to drill into a particular spot, here’s how we recommend spacing your pilot holes:
-
Take the two side pieces of your frame and line them up next to each other. You should be facing the smallest side

-
Take the long piece of the frame and place it on top of the two side pieces by the top edge
-
Mark your pilot holes
Using the top frame is an easy way to ensure the pilot holes are equally spaced out on both sides. You can use a ruler, a bookmark, your spirit level, or another rectangle shaped item you have lying around.

-
Repeat the steps and mark the pilot holes on the other (bottom) side
Next you’ll mark the pilot holes on the longer piece of the frame.

-
Take your tape measure and measure its length from the right to the left side
-
Mark four pilot holes ensuring they are evenly spaced out
Now that you’ve marked all your pilot holes, you can start drilling. Put on your safety glasses and dust mask. You must have marked 8 pilot holes in total.
-
Place a scrap piece of wood under the wooden baton if needed to protect the surface underneath
-
Insert the 5mm high-speed steel drill bit for wood and use the drill to carefully make a hole through all your marked pilot holes. Start drilling slowly and make sure you hold the drill straight through the frame and not at an angle.
If you're a first-time power drill user, we’ve put this introductory article to help you familiarise yourself with how to use it. You can also try practising on some spare wood before drilling into your pilot holes.
One of the most common mistakes you can make at this step is drilling in an angle. If the angle is not very visible that’s okay. When you screw the button into the wall, the hole will expand and fall into place, but if the angle is drastic, we recommend creating a new pilot hole close to the one you initially marked.
Step 5: Drilling your wall & fixing your wall plugs
-
Change your 5mm high-speed steel drill bit to the 8mm masonry drill bit.
To drill into the right spot on your wall, here’s a hack, it’s all about the masking tape.

-
Start with your side wooden baton and cover the side that will join to the wall with masking tape and mark where the pilot holes are
-
Stick the masking tape to the side of your alcove right below the position you’ve marked with the pencil on step 3. Make sure you position the masking tape as close to the inside corner of the alcove as possible

-
Put one of the wall plugs next to the drill bit, tip down. Then get a small piece of masking tape and wrap it around the drill bit where the wall plug ends. This will act as a guide as to how deep to drill into the wall
-
Drill a hole in the wall where you have previously marked, pushing quite firmly. Stop when you get to the masking tape
-
Use a dry brush to get rid of any dust then insert the wall plug. Use a hammer to gently knock it flush with the wall
-
Repeat the last two steps for the remaining pilot holes
-
Repeat all the steps for the remaining two wooden batons
Step 6: Installing your alcove shelf
You’re ready to attach your alcove shelf to the wall.
-
Grab the screws and your three wooden buttons
-
Put your cross head screw bit on the drill
-
Drive the screws through all the pilot holes into the wall plugs until the batons are fixed in position.
-
Take your made-to-measure alcove shelf and slide it through the wooden batons
Congratulations, you have a shelf. And you’ve finished all the hard work! If you’re looking to add more shelves, repeat the steps 3, 4, 5, and 6.
Step 7: Getting the professional built-in look
To achieve a good finish, you’ll use the caulk to fill in any gaps.
-
Get your caulking gun and the caulk.
-
Cut the nozzle of the caulk at a slight angle.
-
Now run a line of caulk around all sides of the shelves where they meet the wall.
-
Work in short sections. Smooth the caulk into the gap with your finger before moving onto the next section.
Allow the caulk to completely dry.
Step 8: Prime time!
You’ll need to prime the wood before you start painting your new shelves.
-
Run masking tape along the edge of the shelves to protect the wall.
-
Open a window/door to allow for air ventilation
-
Get the primer and give it a good stir. The easiest way is to just to give the tin a really thorough shake, with the lid on securely
-
Pour a little primer into the roller tray (more can be added when needed).
-
Start by using a brush to get into any nooks or hard to reach areas to ensure an even and thorough coverage of primer - get into all the edges and corners!
-
Use the roller to cover the remaining surfaces of the shelves ensuring you have an even coverage.
Allow to fully dry before applying a second coat (if needed). When the primer is dry, use the sandpaper (fine grit), to leave the wood feeling glass-smooth. Vacuum any dust off the surface and wipe with a tack cloth.
Step 11: Paint, paint, paint
And you are ready to start painting, time for a break and a cup of tea!
With these steps, you'll have professionally finished and secure alcove shelves. Don't rush the process, take some breaks if you need and if you feel unsure about a step, we’re here to help out. Just reach out to us.


