Perhaps you just moved into your new home and want to make the space your own. Or perhaps you have been in your home for a long time and feel like it's time for a little zhuzh ✨
If the bones of the kitchen are good, up-cycling the cabinets can be a great way to make a kitchen look and feel brand new and at the same time save some money while reducing waste. It’s win-win!
So how do you upcycle an old kitchen cabinet?! All it takes is a lick of paint and some new cabinet bling. Hold on tight, we are about to give you a whistle stop tour of the basic steps to glow up your kitchen cabinets! You can get the full step by step guide in our Cabinet Upcycle Kit.
Step 1: Remove all cabinet doors and drawers.
For the doors, open the door and release the catch at the rear of the hinge. Some Hinges will not have this latch so will require the screws to be removed from the cabinet side using the screwdriver provided. Once removed, unscrew the hinge from the door side, this will make for easier storage and painting.
For the drawers, empty them first, yes that means the messy drawer too 🙈! If they are soft close, it’s a bit easier. Open them all the way, tilt them downwards and remove them. Think Ikea drawers here! If this doesn’t work check if there is a clip on the runner, if so unclip it and try again.
Step 2: Remove all handles and clean
Using a screwdriver, remove all handles from the doors and drawers. Then use a degreaser and cloth to thoroughly clean all areas that you are wanting to paint.
Step 3: Fix them up if needed
If your cabinets are in need of some repairs then push some wood filler into any cracks, damaged corners and surface using a filler knife. Make sure you fill those handles holes if the new ones don’t fit.
If you may have laminate peeling away, especially around the oven. Use some contact adhesive and flatten them back down with a spare, flat block of wood.
Step 4: Sand them down
Lightly sand down the surface you want to paint plus any excess filler. Always wear Safety Goggles and a mask when sanding - safety first! 🦺
Run masking tape along the edges of the cabinets to protect walls and surfaces you don't want to get paint on.
Step 5: Prime time
Run masking tape along the edges of the cabinets to protect walls and surfaces you don’t want to get paint on. It’ll also help to create a crisp edge. Apply the masking tape to the cabinet internal ensuring that it is fully pressed down to avoid paint bleed.
Clean away any dust from the sanding and apply 2 coats of primer. Make sure you have plenty of ventilation. Start by using a brush to get into any nooks or hard to reach areas to ensure an even and thorough coverage of primer. Move onto the roller to cover the remaining surfaces of the cupboards and drawers with primer, ensuring you have an even coverage across all surfaces.
Step 6: Time for some colour
Give the tin a good shake before opening. Using the same technique as the primer apply your finishing paint - we recommend an eggshell for a kitchen as it’s much harder wearing. Allow the paint to fully dry before applying a second coat.
Once the second coat is fully dry, remove the masking tape.
Step 7: Refit the doors and drawers
Refit the hinge to the door side before fitting it to the cabinet this will make it easier to fit to the cabinet.
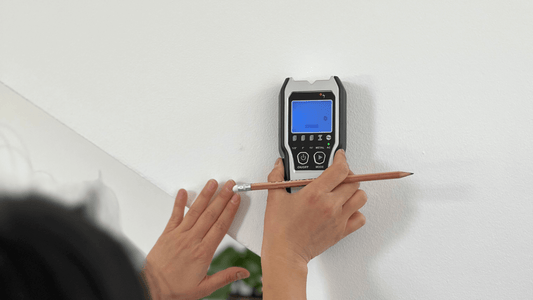
Step 8: Measure out the new handles
Measure the distance between each of the holes and write down the center-to-center measurement. Apply masking tape to the doors in the location you intend to mount the handle, this tape will allow you to mark out the handle location without marking the painted surface of the door.
Step 9: Drill the holes
Make sure that you open the door during the drilling process to ensure that you don’t end up drilling into the frame of the cabinet behind the door. Place a scrap piece of wood on the inside of the door behind the holes that you would be drilling, this wood helps to prevent chipping as the drill bit breaks through the rear of the door.
Step 10: Fit the new handles
Remove the masking tape used to mark out the holes. Using your screwdriver screw the holding screws through the door into the handle, ensuring these are done tight.
And that’s a wrap! Invite some friends around, have a dinner party and enjoy your brand new kitchen cabinets!